

Morning loves! I have been wanting to do a DIY tutorial for a long time... in fact, I've been wanting to DIY for a long time... but I confess I've been scared. I'm a perfectionist, you see. So I want things to be perfect. I also tend to be a bit hard on my self so the conversation goes something like this.
Me #1: Ooo! I can be crafty! I can make something for my home!
Me #2: No you can't! It won't be good enough!
Me #1: Yea, you're right...
And that's the end of it. But yesterday afternoon I told Me #2 to take a hike! I was killing some time at Michael's and I decided to finally make the Ballard Designs inspired artwork that was one of the very first blog posts I ever read.

{Ballard Designs}

I didn't have the blog on me, and didn't think of looking it up on my phone, so I just winged it (is that right? winged? wang? idk...). So I needed pretty paper, glue of some sort, and something square. Canvases were on sale so I got a set of 4. I got some Mod Podge and a brush too. I came home and told my husband all about the plan I was going to do "eventually." He kinda gave me a funny look when I said I didn't know what to do. See, he was reading Harry Potter... and I just finished the last one... so what am I supposed to do with my time? Those of you who are quick are thinking "yea but, you bought crafty stuff, you could... idk... craft?" but I had already forgotten about that! So anyway, with some helpful reminders from my husband I decided to go on my way. What started out as a covered canvas project became much different and actually much cheaper, as you'll see below. This taught me a great lesson though, don't avoid doing projects you see on other people's blogs because it looks like something you can't do. You may be right, but you'll find a way to make it your own and will be all the happier for it!
So here are all my pretty little supplies:

4 pretty blank canvases (6x6)

4 pretty scrapbook papers (I got the thick cardstock-like ones... I got them because they were prettier than the regular papers, but this will be important later.)

Mod Podge and a foam brush
The first thing I did is begin to wrap my canvas like a present.


In order to make the corners smooth, I folded them out to get a 45% angle fold.

Then I laid it flat and cut off the top (to avoid a build up of excess paper making the corner bulky and harder to deal with)

With all of the folds already in place, I wrapped the present right up. It's important to get all of the folds in place before you wrap so that you can get crisp clean lines.

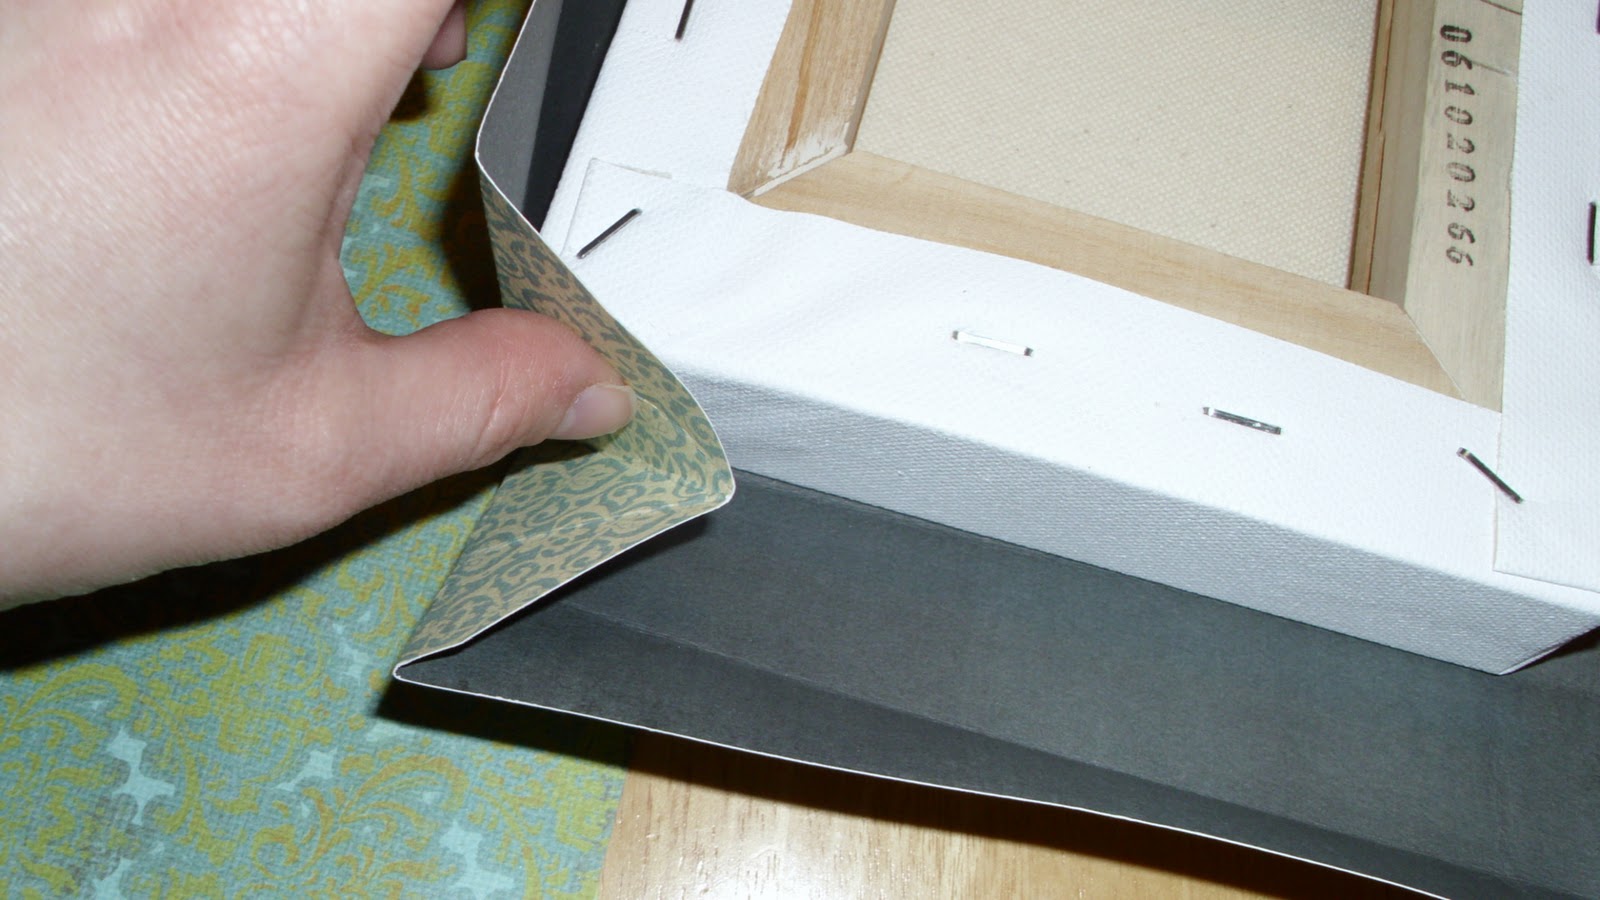

The finished corner should look like this.

At this point (I don't have a picture), but it's looking like a big box without a top on it. I still needed to fold down the paper that's sticking straight up the back. When I did this it was very bulky again, so I made a few more cuts like so:

More wrapping.


And the final back looked like this.

At this point, I realized that the paper was really holding up well on it's own. I started to question whether I needed the canvases at all. After consulting with the boss man (my dear husband), we decided they were sturdy enough to live without canvases underneath. SCORE ONE FOR KRISTI! I now have 4 blank canvases for ANOTHER project! Woo hoo!
I unwrapped the canvas, pulled it out, and modgepodged my box together. We decided to go for a matte look, and since I had purchased semi-gloss modge podge I was very careful not to get any on the front or sides. If you purchased different modge podge or wanted a shinier look, you could always cover the whole thing, which would really save a lot of worrying about getting glue everywhere!
So here's the final project!

A beautiful wrapped canvas. And here's a shot of my secret...

All empty!
And here's the beauty on the wall! Yes, I know it's a little empty, but little man went to take a nap and we can't do any more hammering/hanging until he wakes up.

Final cost for this project $2.
The canvases were $12.99 (40% off... and I didn't use them anyway).
The Mod Podge was $3.89 (I don't count this because I barely used it at all).
The sponge brush was $0.39 (Also not counted since it will be reused).
The scrapbook paper was $2.00 (on sale 2/$1).
And it took about an hour!
Lessons I learned in my first DIY project...
1) Don't be afraid... just try it!
2) You could make the boxes SOOO much easier if you had a silhouette machine! Oh wait! I do... except I'm too scared to try it (see lesson #1)!
And finally a HUGE THANK YOU to Sarah at Thrifty Decor Chick for the inspiration and for really getting me in to DIY design in the first place!
I linked up!

That is too cool! I love it and can't wait to try my hand at it. I did a Ballard Design print DIY yesterday on my blog House Dressing. I just love recreating art on a shoe-string.
ReplyDeleteI really like these. I like art that is simple, yet elegant - like splothches of color or just scrapbooking paper. You've certainly given me some ideas. :)
ReplyDeleteThanks for sharing.
Cheers,
Tracy All Thumbs Crafts
I love this!
ReplyDeleteAlmost makes me think I could do it . . .